Sew Crochet Pieces Together
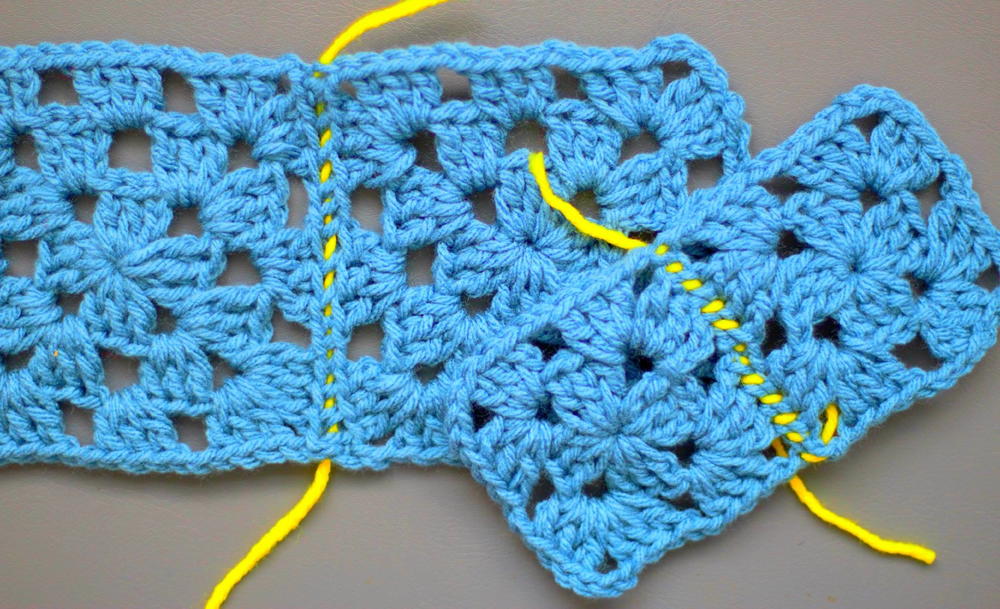
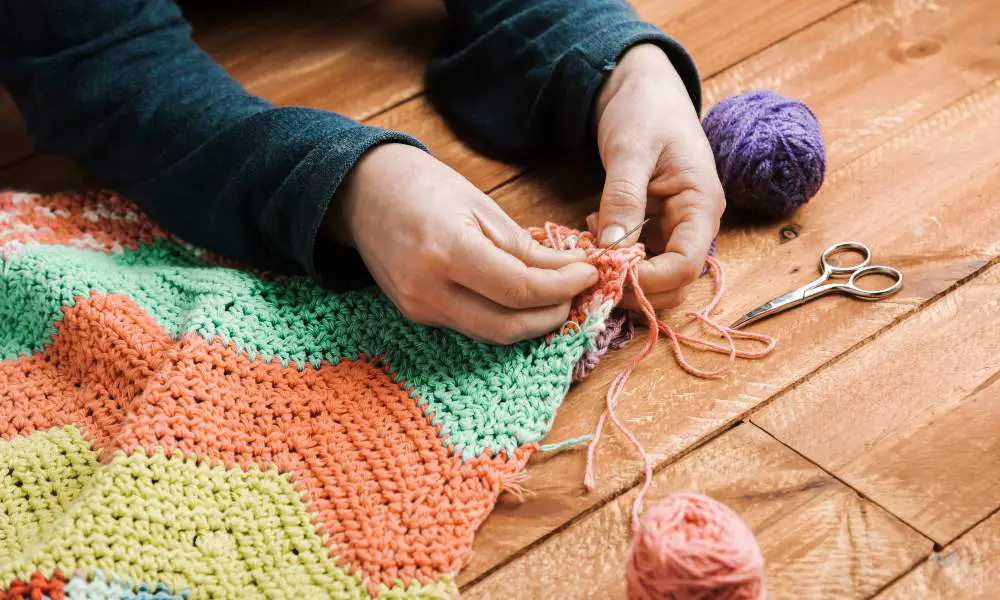
Sew Crochet Pieces Together - This tutorial is for you! The usual situation is that you have an open crochet piece (in this case the green one) with an additional thread that you can use to sew it onto another crochet piece (in this case the reddish one). Web how to sew crochet pieces together. The first method called the weave stitch is ideal for items such as granny squares or garments where you want a nice flat seam. Web there are multiple ways to attach crocheted pieces together. Web if you have two pieces of crochet to sew together, use the mattress stitch! Web getting proficient at how to sew crochet pieces together, in particular your amigurumi, takes lots of practice… but it’s worth it! Sweaters and granny squares are the most common crocheted projects that need to be seamed, but others like hats or pocket scarves need it too! You may need to attach pieces of a sweater, for example, or attach blocks together to make a throw. Plus there are some really interesting sewing needles that work great with yarn. The usual situation is that you have an open crochet piece (in this case the green one) with an additional thread that you can use to sew it onto another crochet piece (in this case the reddish one). This guide will give you a few tips on how to sew different parts of your amigurumi creations together. Mattress stitch, whip stitch and invisible seam. This is frequently done when a project, such as a crochet blanket, is made in motifs; Sewing your crochet or knit pieces together doesn't have to be difficult. Web learn how to seam crochet pieces together using the surface slip stitch method. Web certain techniques are useful when joining crochet pieces. The first method called the weave stitch is ideal for items such as granny squares or garments where you want a nice flat seam. Web learn how to join crochet pieces together with these four seaming techniques, from the invisible join to a single crochet join. Web unlock the secrets of seamless crochet assembly! Web unlock the secrets of seamless crochet assembly! Sweaters and granny squares are the most common crocheted projects that need to be seamed, but others like hats or pocket scarves need it too! Web learn how to join crochet pieces together with these four seaming techniques, from the invisible join to a single crochet join. Web if you have two. This tutorial is for you! Web unlock the secrets of seamless crochet assembly! Web learn how to sew crochet pieces together with three different sewing techniques. Joining pieces together has never been so easy! You seam together all of the motifs to create the finished project. The second method whip stitch is an option. I'll show you how to sew amigurumi pieces together. Web sewing can be really scary for some new crocheters, but don’t worry, in this blog post i’ll show you how to conquer your fears and learn a one size fits all technique for sewing amigurumi pieces together. There’s also a method called. To sew amigurumi pieces together, hold the open (unseamed) piece on top of the closed (smooth) piece. A favorite when joining crocheted granny squares or crocheted clothing. Mattress stitch, whip stitch and invisible seam. This is frequently done when a project, such as a crochet blanket, is made in motifs; Web certain techniques are useful when joining crochet pieces. Web learn how to sew crochet pieces together with three different sewing techniques. Web getting proficient at how to sew crochet pieces together, in particular your amigurumi, takes lots of practice… but it’s worth it! The first method called a weave stitch is ideal for sewing pieces where you want. I'll show you how to sew amigurumi pieces together. The. The first method called a weave stitch is ideal for sewing pieces where you want. Sewing your crochet or knit pieces together doesn't have to be difficult. Web certain techniques are useful when joining crochet pieces. Mattress stitch, whip stitch and invisible seam. Sweaters and granny squares are the most common crocheted projects that need to be seamed, but others. This tutorial teaches you how to join crochet pieces together using the whip stitch, ma. Web learn how to sew crochet pieces together using the mattress stitch, in this video and picture tutorial. Web learn how to seam crochet pieces together using the surface slip stitch method. ⬇️⬇️⬇️⬇️ click show more to get the links 💖#howtoseamcrochet #surfaceslipsti. Web learn how. Learn how to sew crochet squares and pieces together using three different types of stitches. Discover the benefits of each seam method and how to choose the right one for your project. This tutorial is for you! These are very simple and beginner friendly techniques that you will master in. Learn to make an invisible seam for your crochet projects. Web learn how to seam crochet pieces together using the surface slip stitch method. Web learn how to sew crochet pieces together using the mattress stitch, in this video and picture tutorial. Web to help you achieve a neat and tidy looking crochet project i have put together a list of basic techniques on how to seam or connect two. ⬇️⬇️⬇️⬇️ click show more to get the links 💖#howtoseamcrochet #surfaceslipsti. Web seaming crochet simply means joining two or more pieces of crochet fabric together. Thread a tapestry needle and insert. The first method called a weave stitch is ideal for sewing pieces where you want. Web learn the best ways to seam crochet pieces together. Mattress stitch, whip stitch and invisible seam. This guide will give you a few tips on how to sew different parts of your amigurumi creations together. Web to actually sew pieces together, i usually use a simple whipstitch, meaning wrapping the yarn around and around the stitches. Web learn how to sew crochet pieces together with three different sewing techniques. Sew in the outermost stitch to avoid a thick seam, we show 2 methods in the video. In this post i share 2 methods for sewing pieces together. Web learn the best ways to seam crochet pieces together. Web how to sew crochet pieces together. Discover the benefits of each seam method and how to choose the right one for your project. You may need to attach pieces of a sweater, for example, or attach blocks together to make a throw. The first method called a weave stitch is ideal for sewing pieces where you want. Web to help you achieve a neat and tidy looking crochet project i have put together a list of basic techniques on how to seam or connect two or more crochet pieces together. Learn to make an invisible seam for your crochet projects. This video will cover how to sew in all of those. Web looking for an easy way to sew crochet amigurumi pieces, like a leg or an arm, to a body? This tutorial is for you!
How To Sew Crochet Blocks Together

How to Sew Crochet Pieces Together Winding Road Crochet

How To Sew Crochet Pieces Together

How To Stitch Together Crochet Pieces
How to Sew Crochet Pieces Together

How to Sew Crochet Pieces Together Winding Road Crochet
How To Sew Crochet Pieces Together A Seamless Fusion Of Stitches

How to Sew Crochet Pieces Together Winding Road Crochet

How to Sew Crochet Pieces Together Winding Road Crochet

How to Sew Crochet Pieces Together Using the Mattress Stitch
This Is Frequently Done When A Project, Such As A Crochet Blanket, Is Made In Motifs;
These Method Come In Handy For All Different Types Of.
Web Learn How To Sew Crochet Pieces Together Using The Mattress Stitch, In This Video And Picture Tutorial.
Web How To Sew The Crochet Pieces Together.
Related Post: